Ingredients
- Wheat flour (Aata)
- Active dry yeast 1 tbsp
- Sugar 2 tsp
- Salt 1 tsp
- Luke warm milk 1.5 cup
- Corn flour 3 tsp mixed in 1/4 cup water
- Oil 3 tsp
- Luke warm water for kneading
Kulcha glue (Slurry)
- Wheat flour 4 tsp
- Water 1/4 cup
- Brush for applying kulcha glue
Topping
- Dried coriander
- Butter
Preparation
- In a mixing bowl, add wheat flour, yeast, sugar, salt and mix.
- Add warm milk and oil to the wheat flour mixture.
- In a small cup mix corn flour in 1/4 cup water and add to the wheat flour mixture.
- Mix using spatula, when it starts to come together, use your hands to knead the dough.
- Add luke warm water while kneading to make a soft and pliable dough.
- Shape the dough into a ball and apple oil all over.
- Cover and allow to rise until double in size (30-40 minutes).
- Take out the dough and deflate using your hands.
- Cut into 8 equal parts and shape each party into a ball.
- Cover and again allow to rise until double in size (this time it will only take 10-15 minutes).
- Meanwhile, prepare kulcha glue by mixing wheat flour in water.
- Place a tawa on stove top and turn on the flame (medium to high)
- Now dust some wheat flour on the countertop, press a dough ball using your hands and roll it using a rolling pin into a thin oval shape. NOTE: Kulcha dough will rise while cooking so make sure you roll it thin just like a roti (about 3-4 mm).
- Apply kuclcha glue to it using a brush and place it on the tawa. Gently stick the edges of kulcha on the tawa using your hands.
- Allow to cook until the bubbles form on the kulcha.
- Now carefully turn the tawa upside down and cook the kulcha directly on the flame.
- When the kulcha is cooked, take it off the tawa using a plain spatula.
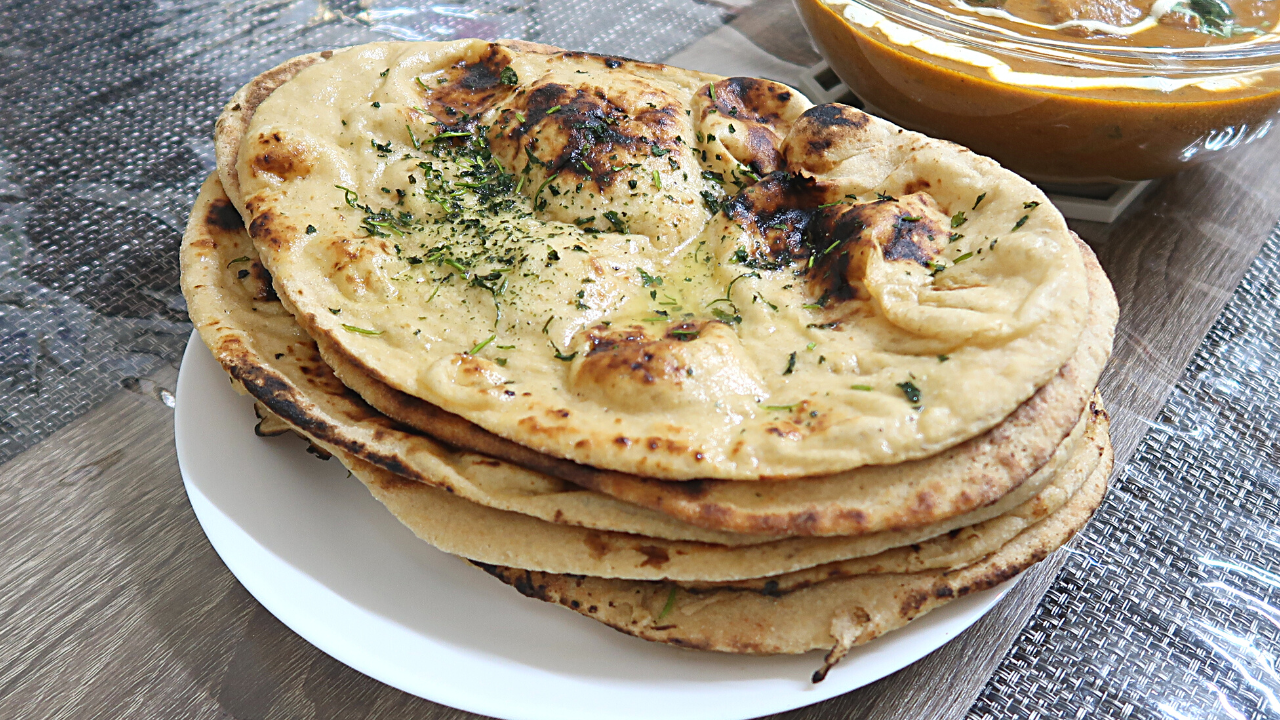
- Apple butter on one side and sprinkle sone fresh or dried coriander.
- Serve and enjoy with any curry or kebabs.
Wheat Kulcha On Stovetop – “On a Non-stick Tawa using Kulcha Glue”
Ingredients
- Wheat flour Aata
- Active dry yeast 1 tbsp
- Sugar 2 tsp
- Salt 1 tsp
- Luke warm milk 1.5 cup
- Corn flour 3 tsp mixed in 1/4 cup water
- Oil 3 tsp
- Luke warm water for kneading
Kulcha glue (Slurry)
- Wheat flour 4 tsp
- Water 1/4 cup
- Brush for applying kulcha glue
Topping
- Dried coriander
- Butter
Instructions
- In a mixing bowl, add wheat flour, yeast, sugar, salt and mix.
- Add warm milk and oil to the wheat flour mixture.
- In a small cup mix corn flour in 1/4 cup water and add to the wheat flour mixture.
- Mix using spatula, when it starts to come together, use your hands to knead the dough.
- Add luke warm water while kneading to make a soft and pliable dough.
- Shape the dough into a ball and apple oil all over.
- Cover and allow to rise until double in size (30-40 minutes).
- Take out the dough and deflate using your hands.
- Cut into 8 equal parts and shape each party into a ball.
- Cover and again allow to rise until double in size (this time it will only take 10-15 minutes).
- Meanwhile, prepare kulcha glue by mixing wheat flour in water.
- Place a tawa on stove top and turn on the flame (medium to high)
- Now dust some wheat flour on the countertop, press a dough ball using your hands and roll it using a rolling pin into a thin oval shape. NOTE: Kulcha dough will rise while cooking so make sure you roll it thin just like a roti (about 3-4 mm).
- Apply kuclcha glue to it using a brush and place it on the tawa. Gently stick the edges of kulcha on the tawa using your hands.
- Allow to cook until the bubbles form on the kulcha.
- Now carefully turn the tawa upside down and cook the kulcha directly on the flame.
- When the kulcha is cooked, take it off the tawa using a plain spatula.
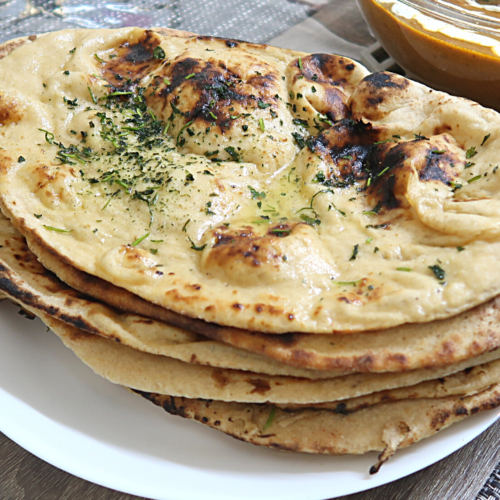
- Apple butter on one side and sprinkle sone fresh or dried coriander.
- Serve and enjoy with any curry or kebabs.